
I’ve taken an interest in the #JAMstack approach to modern web development, mainly because the architecture leverages the best tool for the job, for each of the elements that make up a modern web site.
Using Azure as a JAMstack platform, we can leverage the following technologies:
| Azure service | Role in JAMstack architecture |
|---|---|
| BLOB Storage with Static site | Hosting static artefacts produced by tools like Gatsby |
| Azure CDN | Low latency delivery fo static artefacts, enabling custom domain with SSL |
| Azure Function | Low-code solution to offering server-side storage and authentication |
| Azure Table Storage | Low-cost solution to server-side data storage |
The beauty of the JAMstack model is where the role of static artefact storage and delivery is agnostic to the platform used. BLOB Storage, static sites, and CDN’s, are largely the same and you can select your preferred platform depending on whatever religious beliefs you hold.
Developing server-side functionality is, however, tied a little more closely to the platform. While Microsoft is going out of their way to make Azure Functions agnostic to the software language used, there is no standard way to develop such software that is easily transported to another provider without significant work. If I build an Azure Function that calls in to an Azure Table, I’m writing that code against the libraries for those technologies.
Late in 2018, Azure Functions had a neat addition to the data binding injection making it extraordinarily easy to add authentication to an Azure Function. This approach also gives the developer absolute control over how the authentication is used, because it can be implemented regardless of the AuthorizationLevel applied to the function, including Anonymous.
For the JAMstack architecture, implemented on Azure, clients will connect to the Azure Function configured as an HTTP Trigger. Authentication of these calls can be implemented with the OAuth2 Implicit Grant pattern. The Azure Function app service is also easily configured with Azure Active Directory as an authentication provider.
Create the Azure Function app
- Browse to the Function App page in the Azure Portal
- Click Add, and enter details for your app
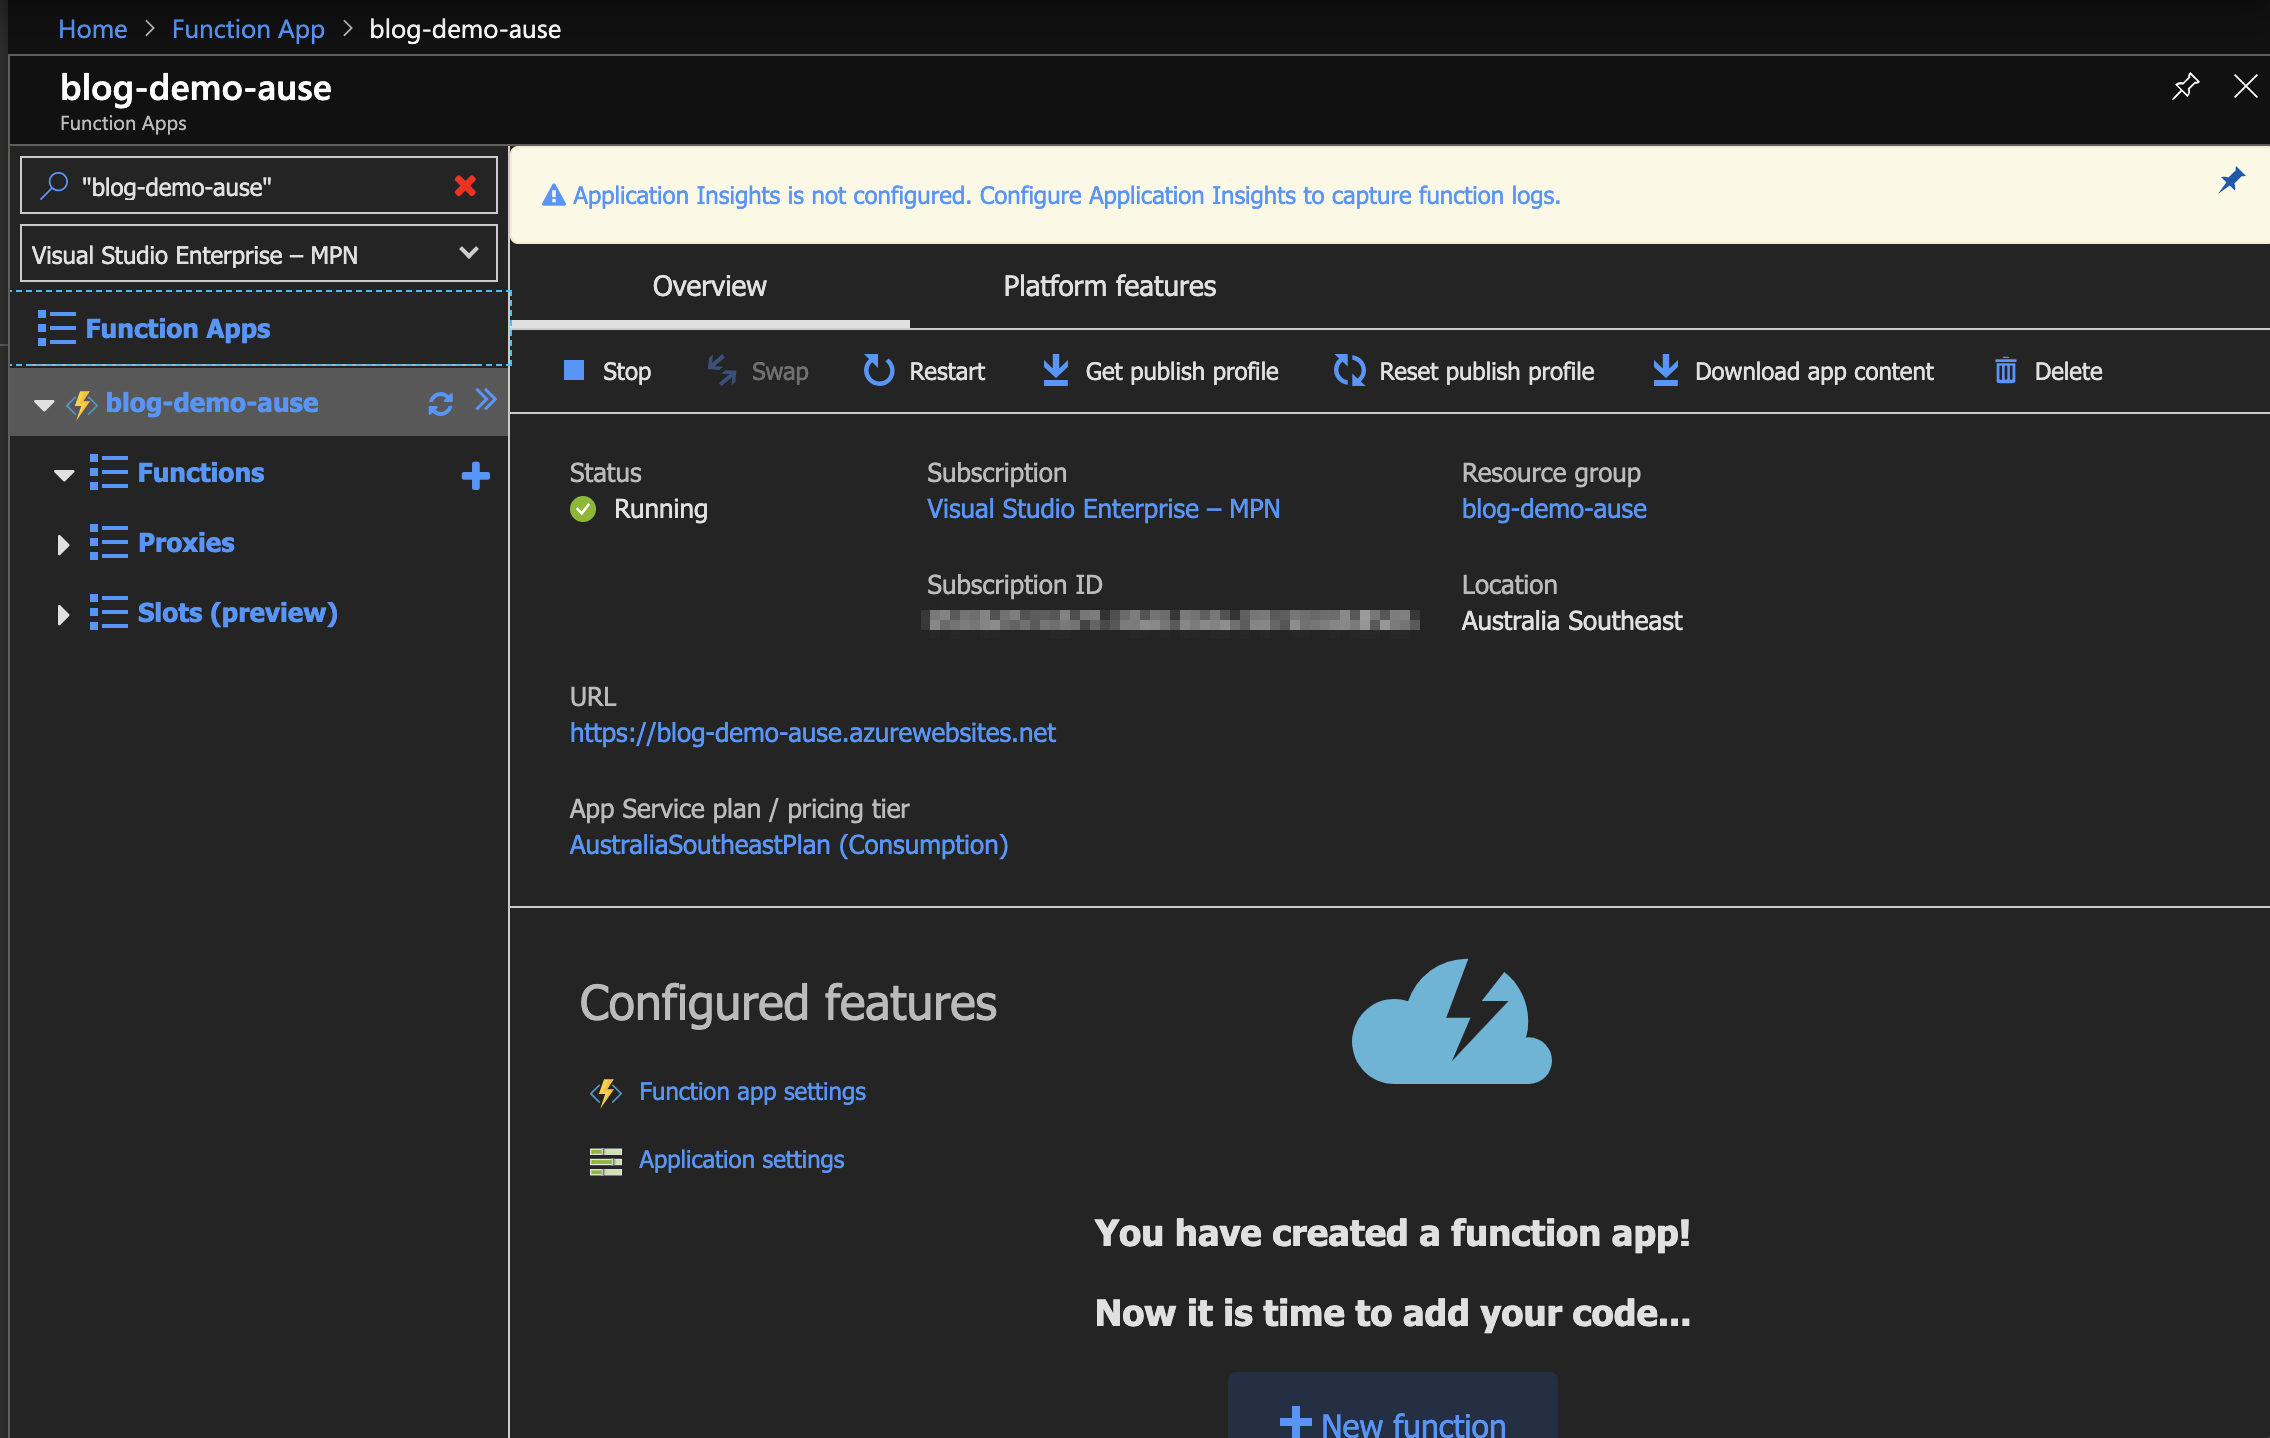
- Wait for the Function App deployment to complete
- Browse to the Function App page again
- Click the Name of the newly created Function App to browse to its overview
- Click the Platform features tab
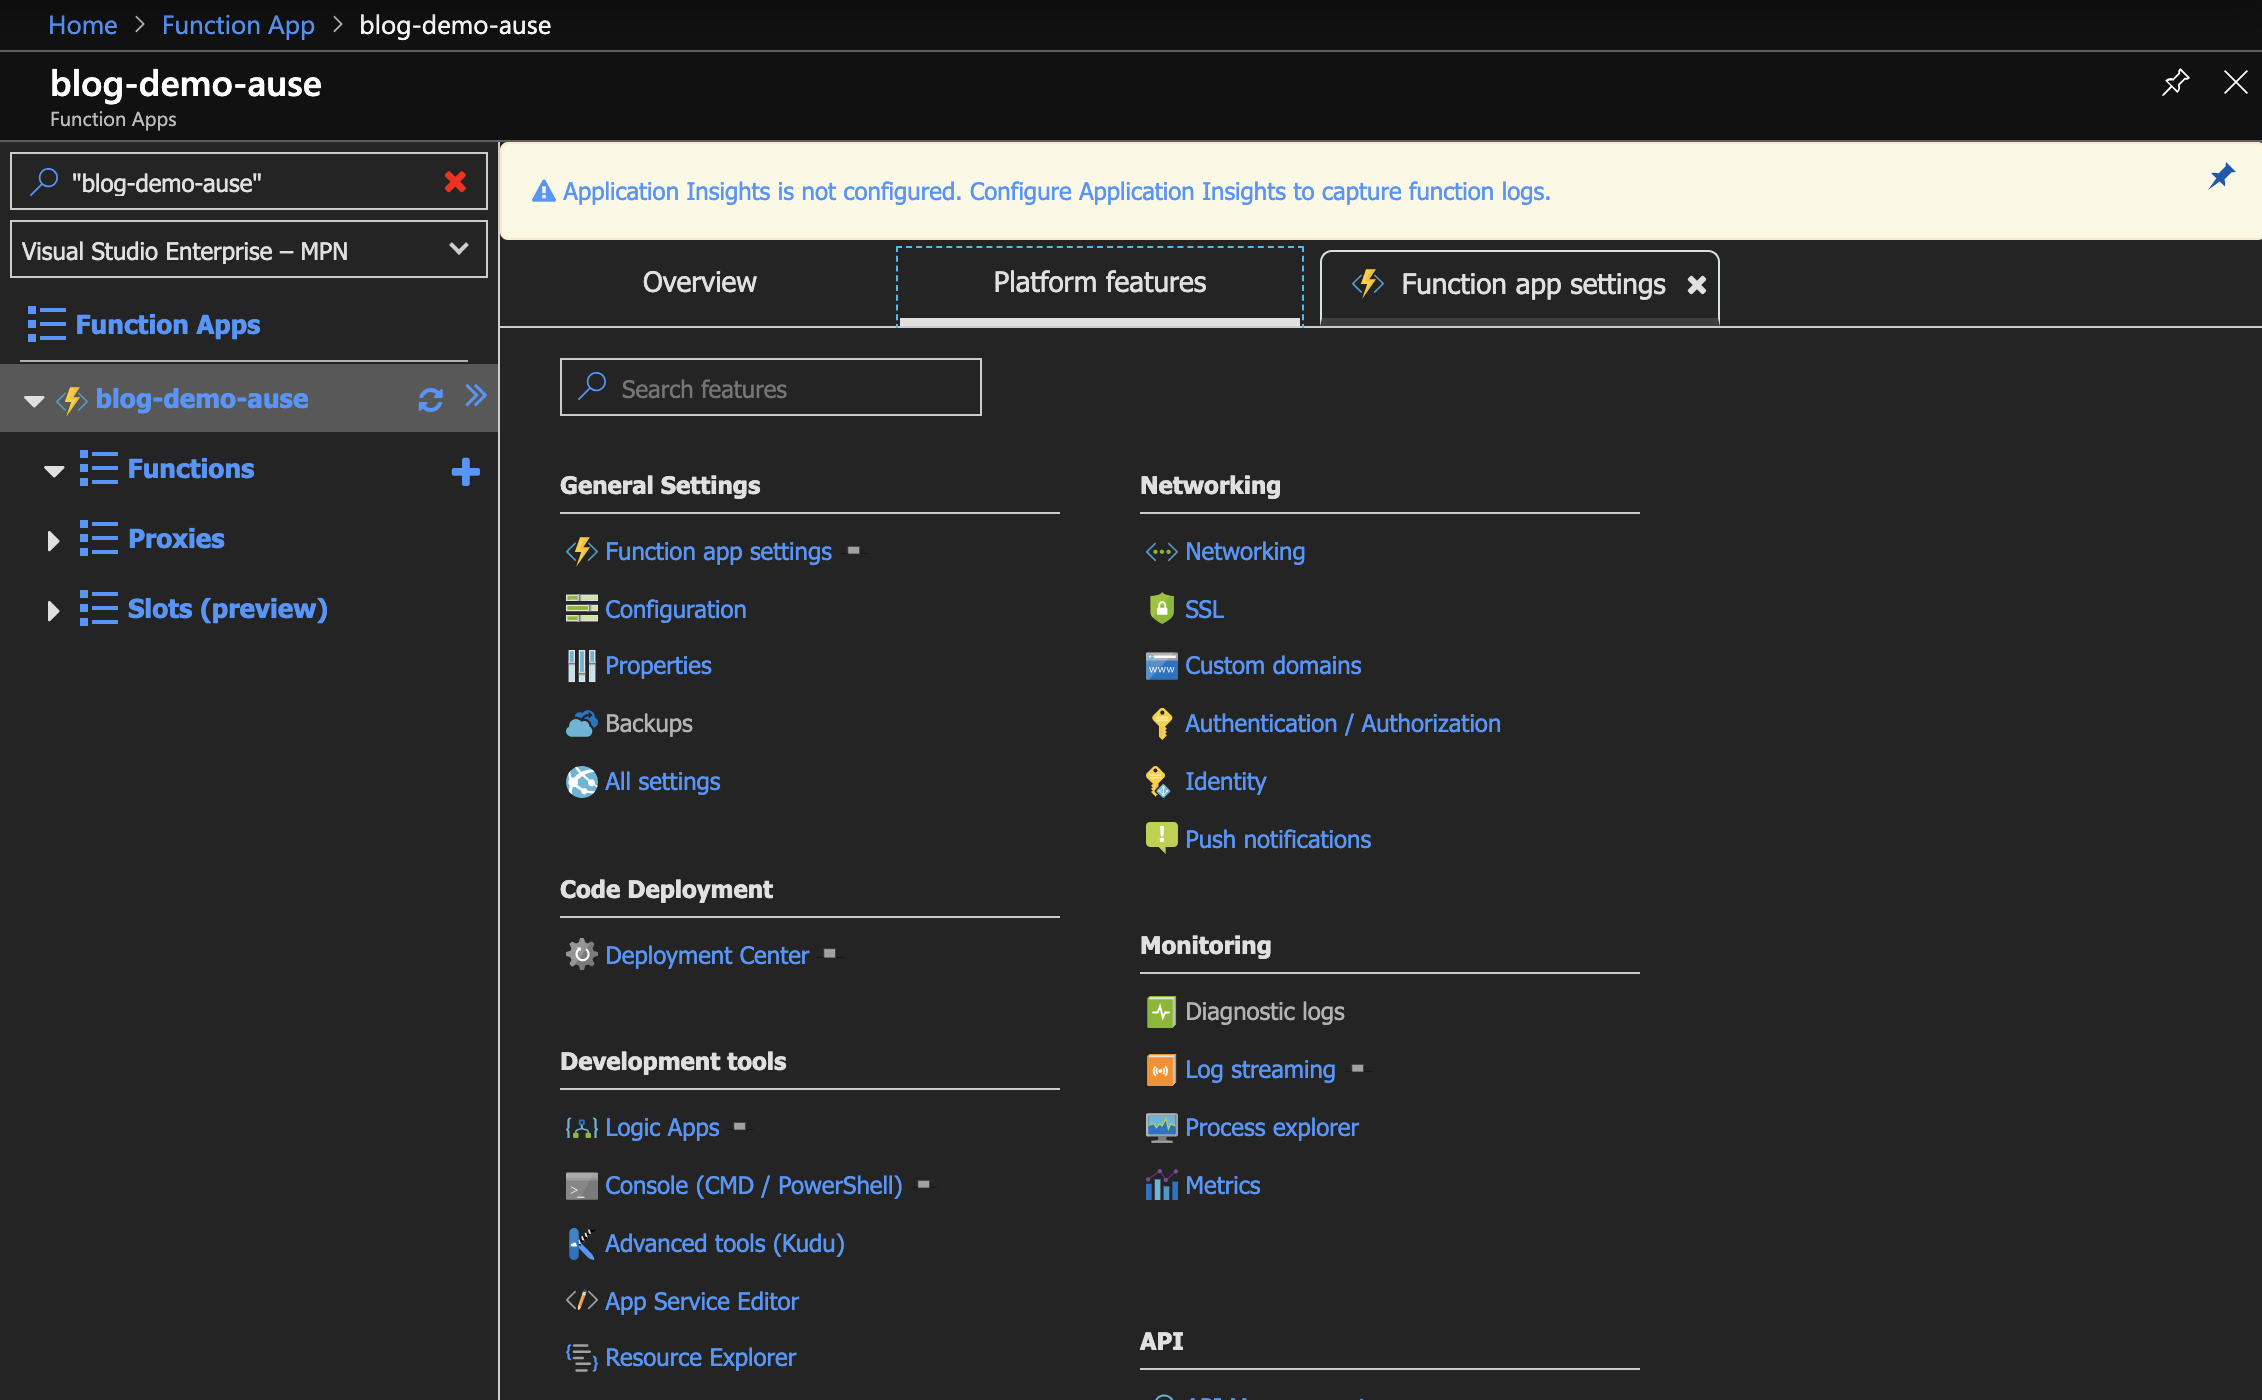
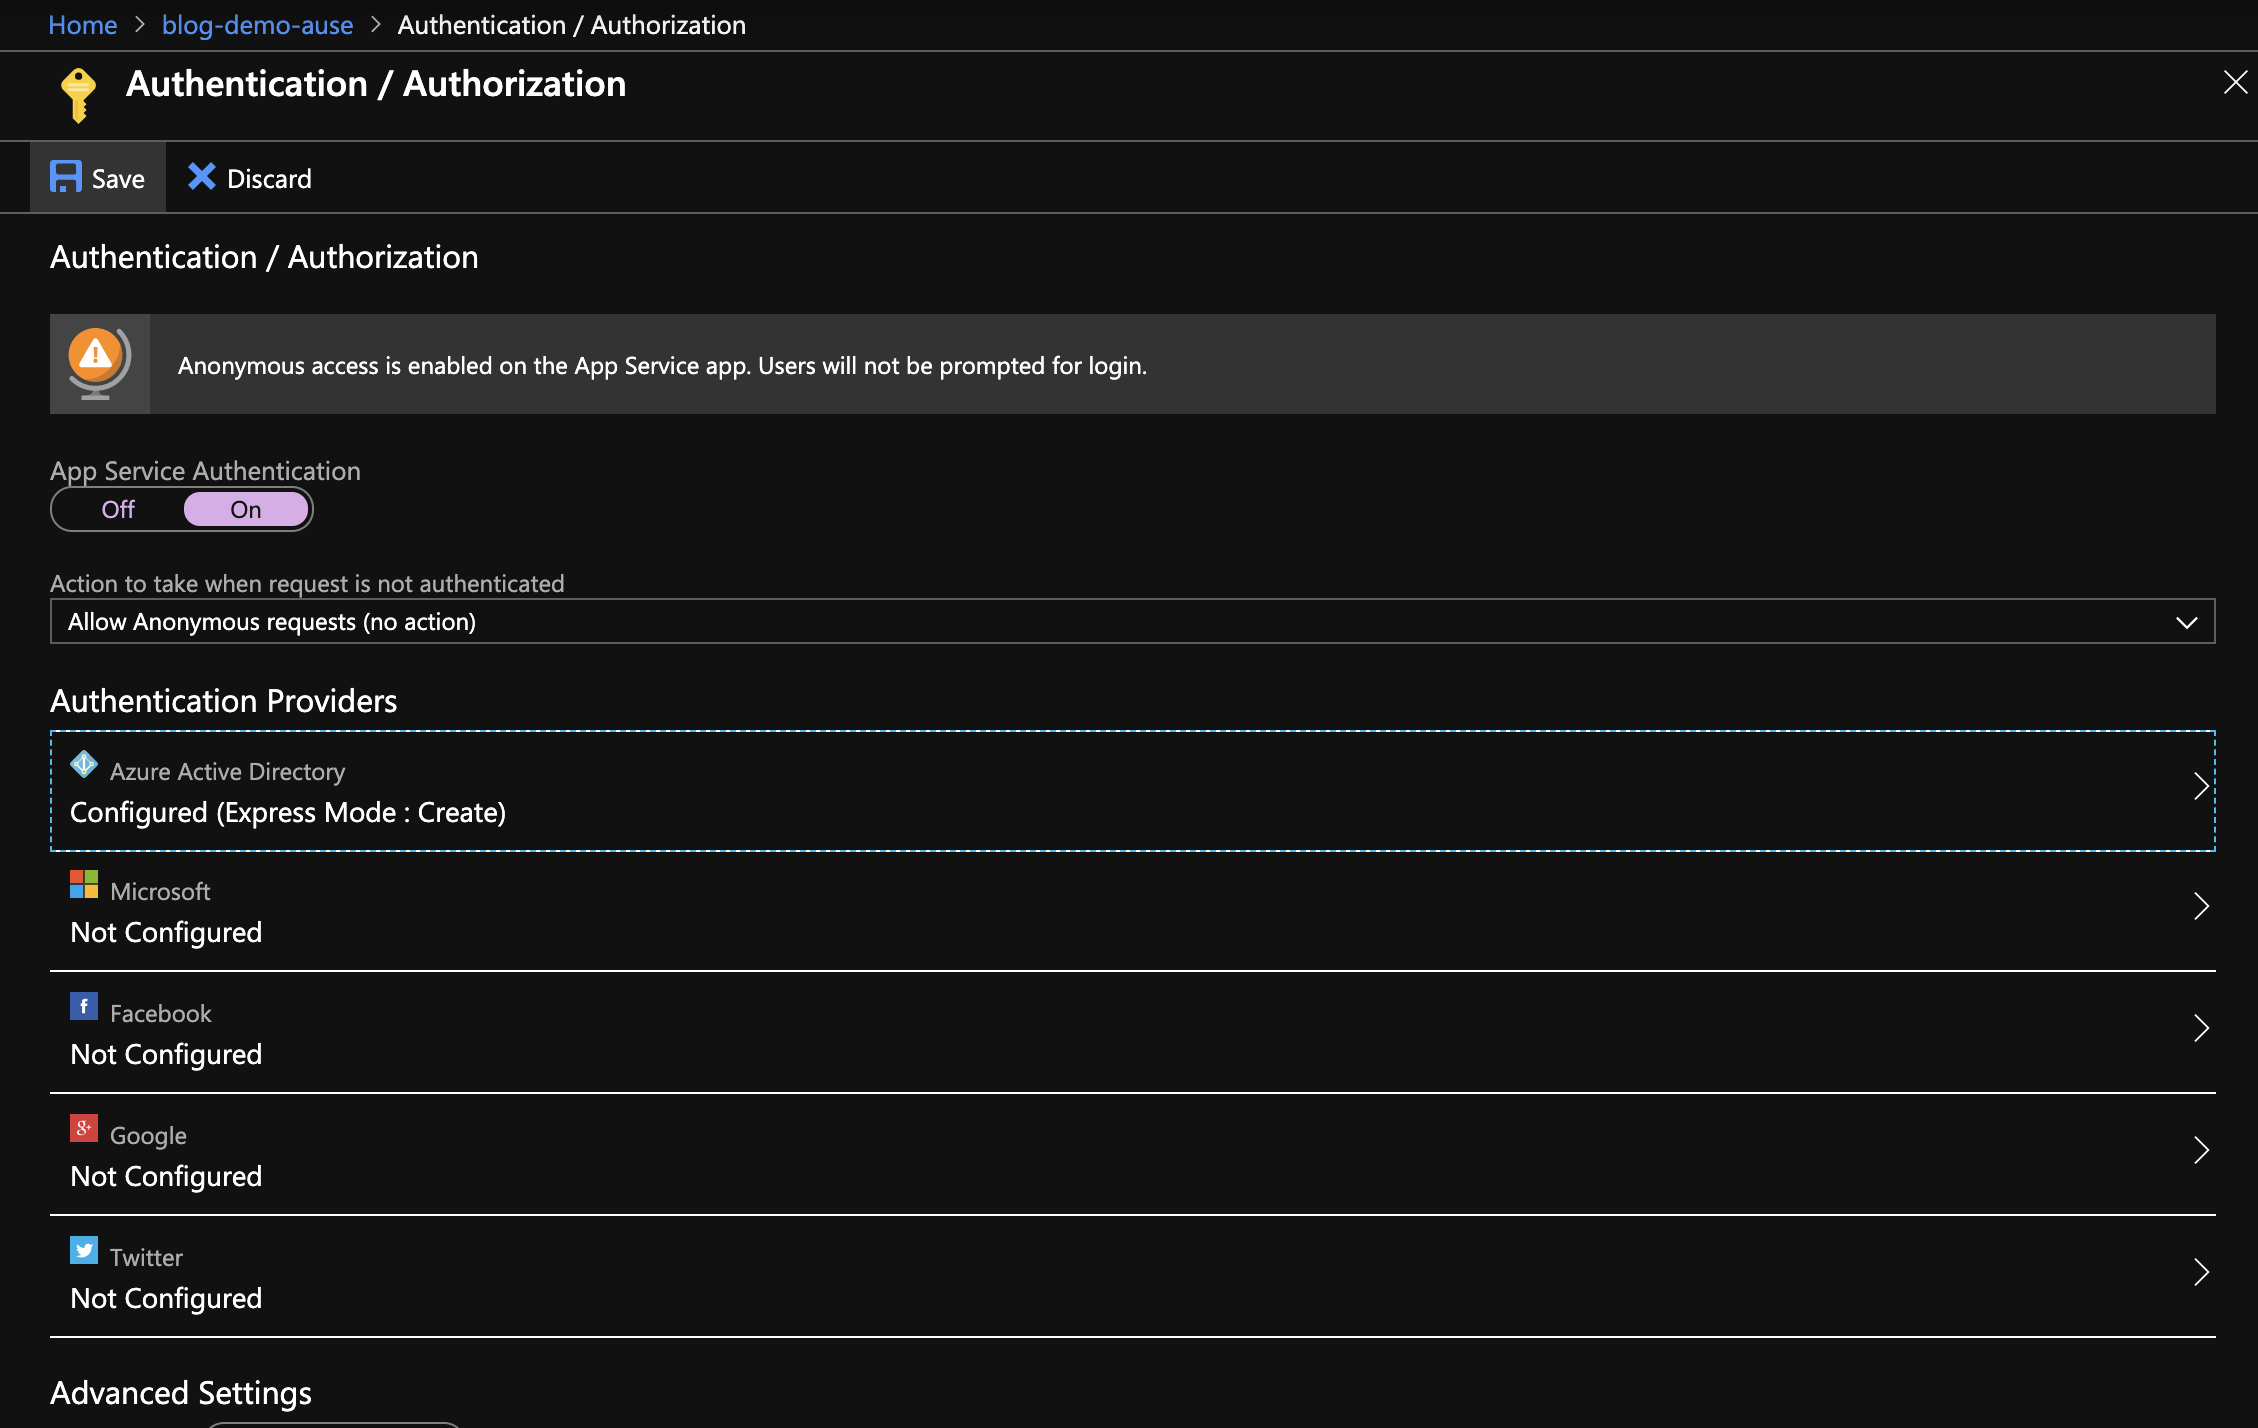
- Click the Authentication / Authorization link:
- Toggle the App Service Authentication to the On position
- Click Azure Active Directory from Authentication Providers
- From Active Directory Authentication, change the management mode to Express
- Select the option to Create New AD App
- Click OK
- Click the Save button under the Authentication / Authorization heading
- Click the plus button next to the Function App’s Functions heading
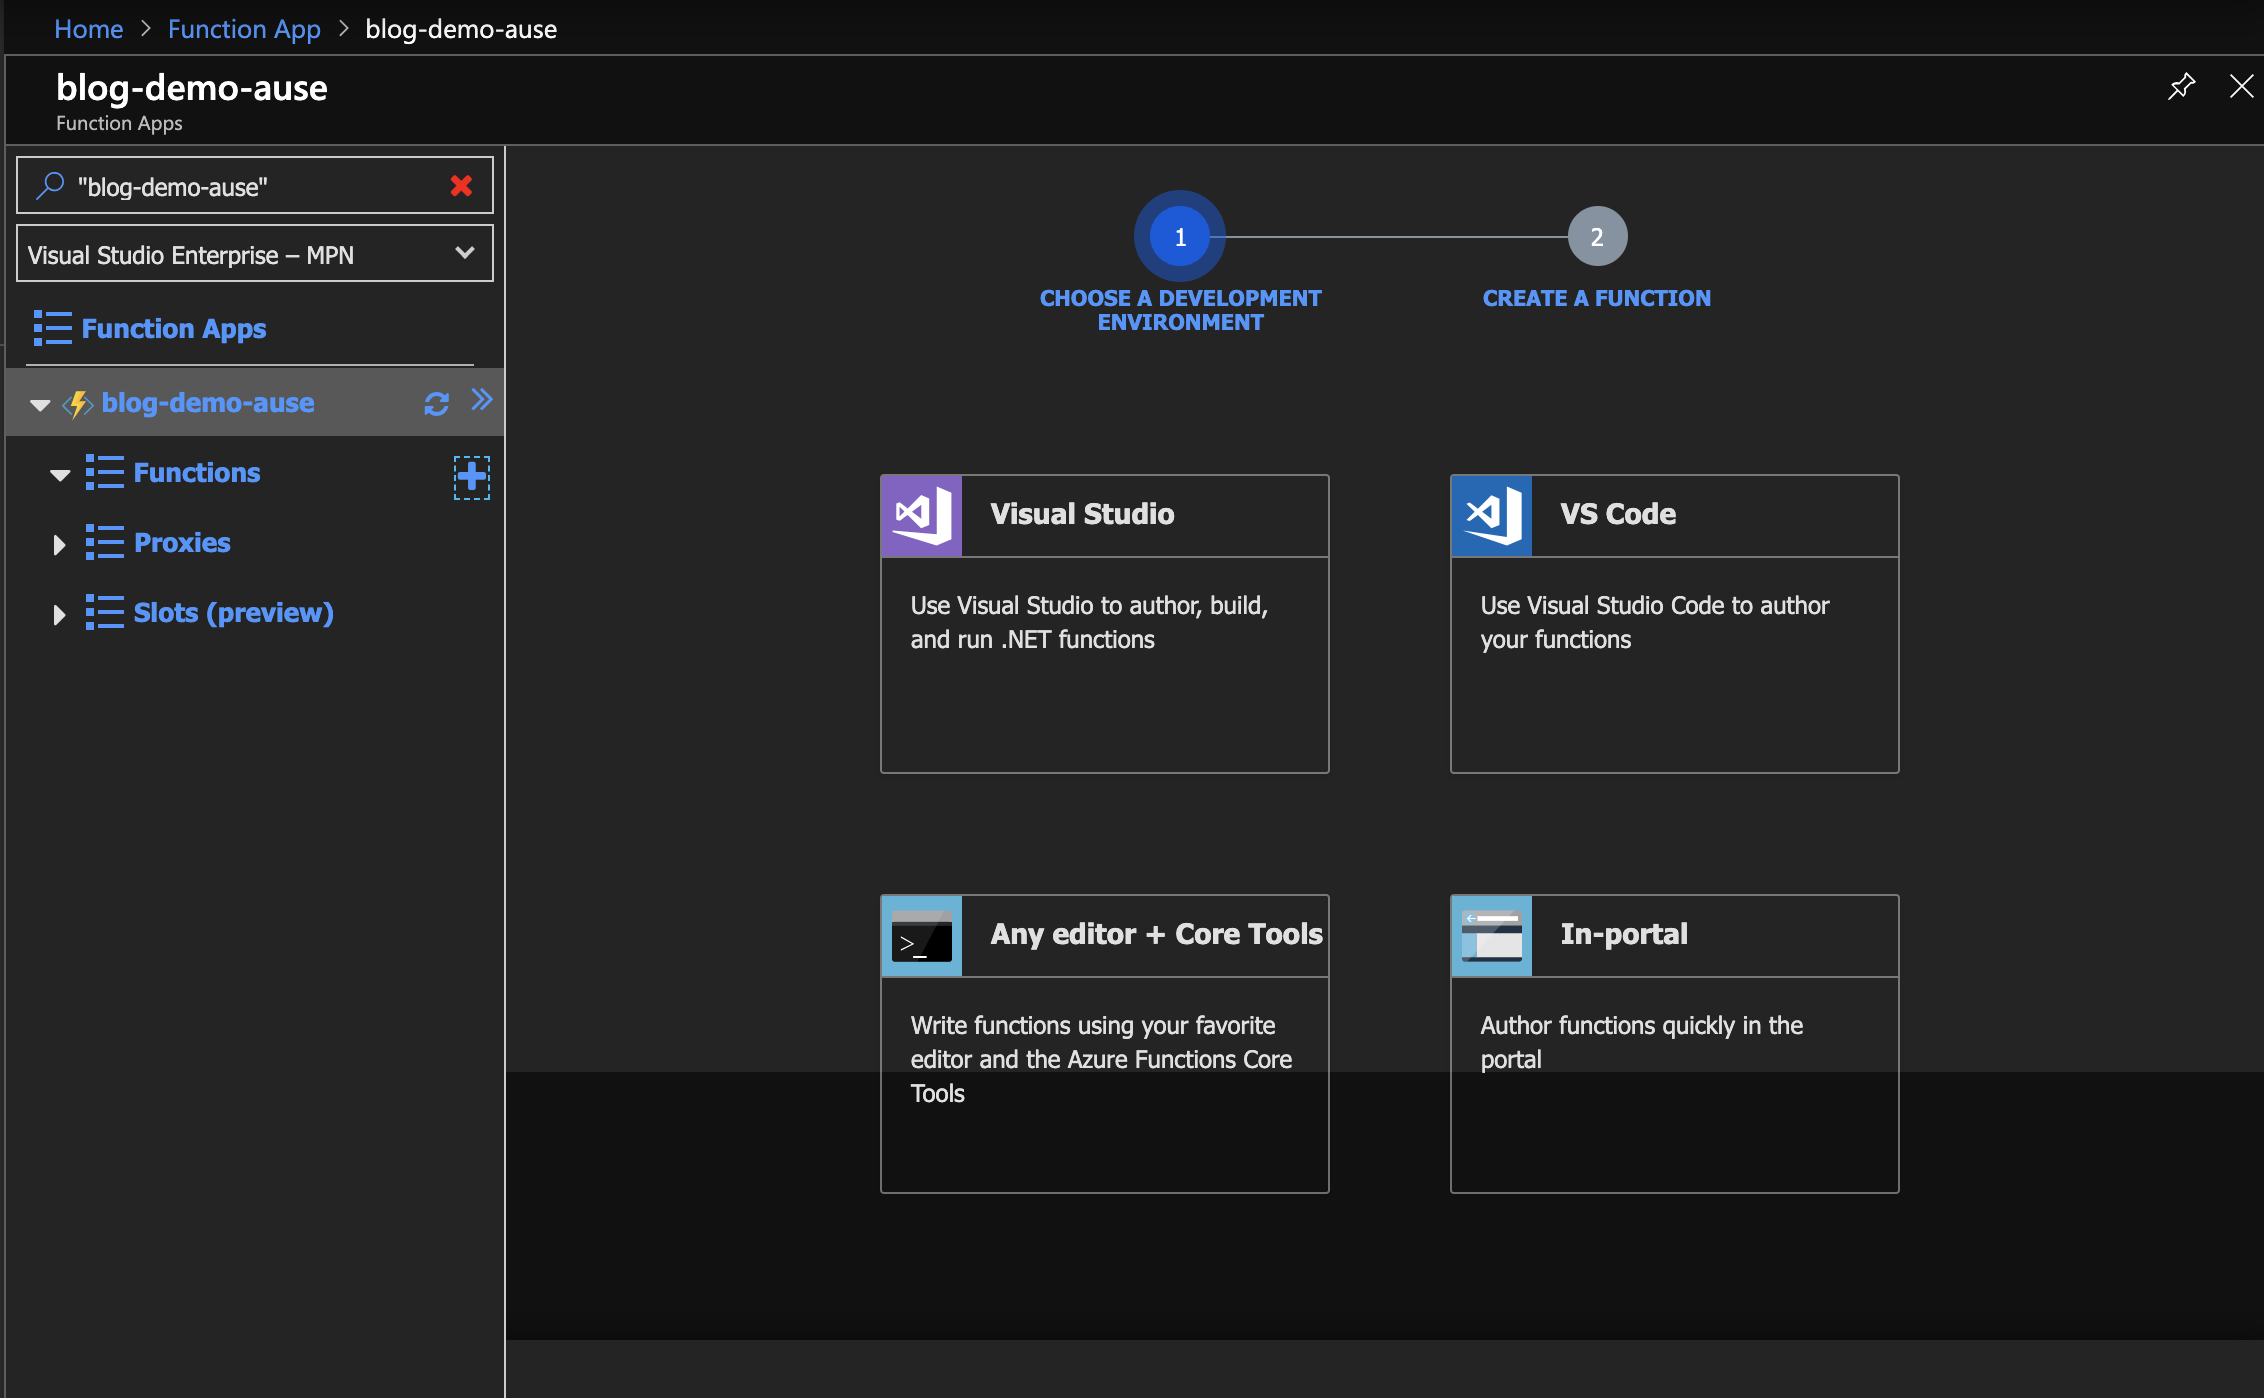
- On the first step, select the In-portal option
- On the second step, select the More templates option
- Click Finish and View templates
- Select HTTP Trigger
- Give the Function a name, e.g. HttpTriggerIdentity
- Change the Authorization Level to Anonymous
- Copy and paste the following code in to the run.csx file:
using System.Linq;
using System.Net;
using System.Security.Claims;
using Microsoft.AspNetCore.Mvc;
using Microsoft.Extensions.Primitives;

public static IActionResult Run(HttpRequest req, ILogger log, ClaimsPrincipal principal)
{
    log.LogInformation("C# HTTP trigger function processed a request.");

    log.LogInformation($"Identity is: {principal.Identity.Name}, isAuthenticated = {principal.Identity.IsAuthenticated}");
    return new OkObjectResult($"Identity is: {principal.Identity.Name}, isAuthenticated = {principal.Identity.IsAuthenticated}");
}
- Save the run.csx file, and click the Get function URL button
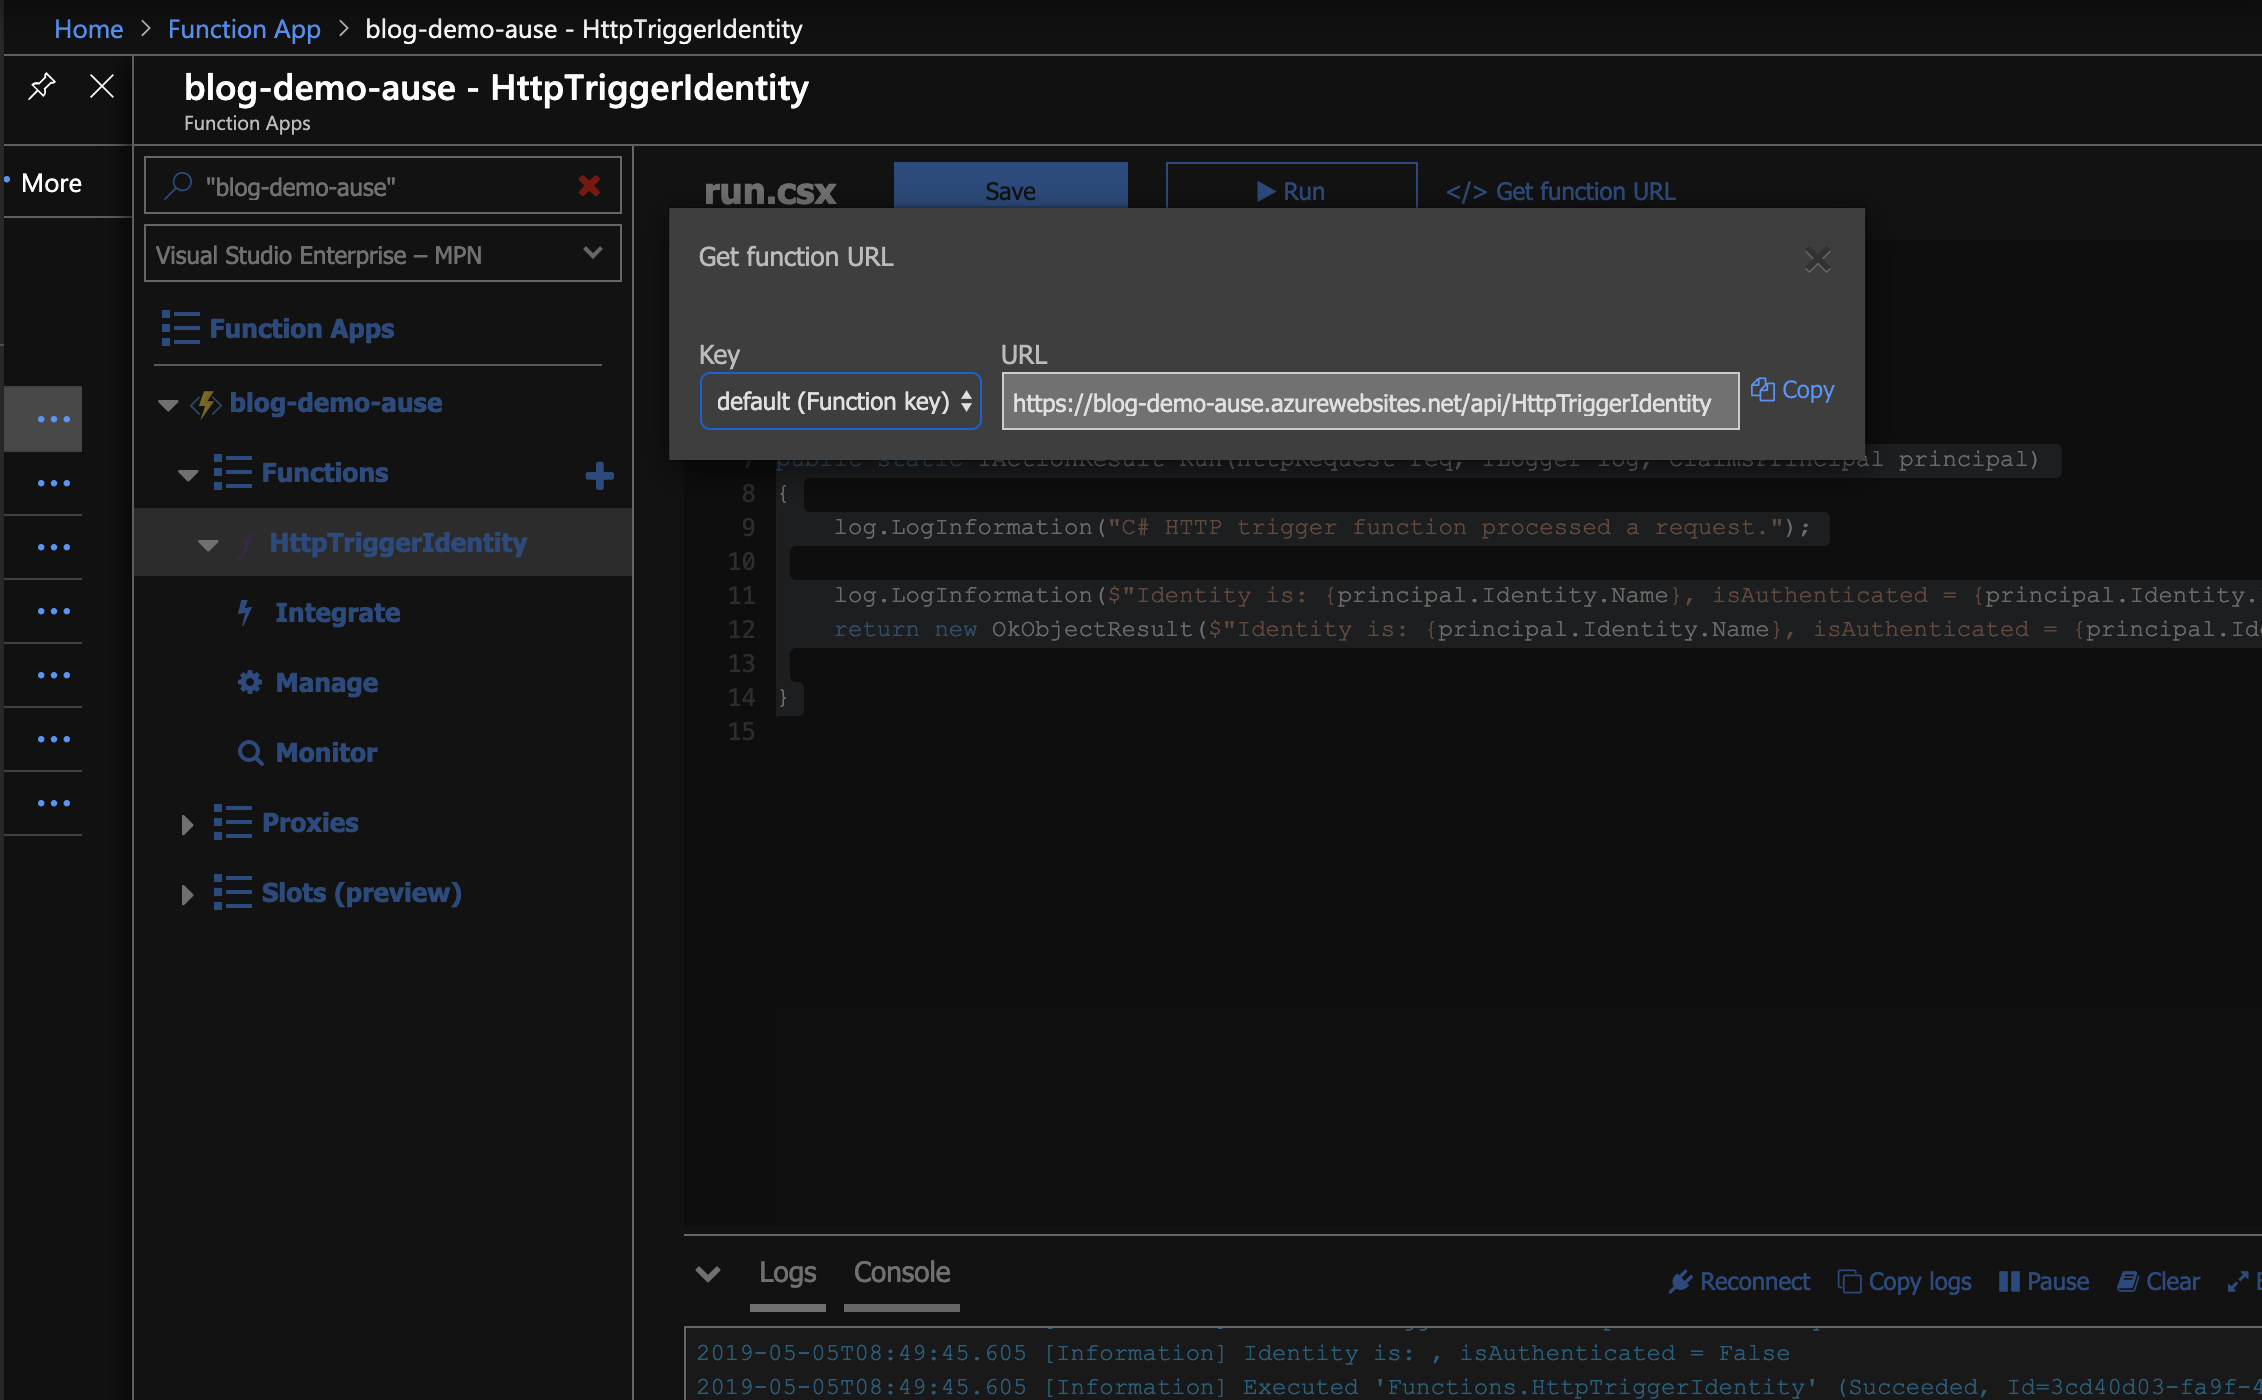
- Copy the URL, and open a new browser window in private / incognito mode, and ensure there aren’t any cookies or other stored authentication tokens in the window’s local storage or cookie data
- Enter the function URL into the address bar, you should see a response like this:
Identity is: , isAuthenticated = False
Authenticate your client with Azure AD v2.0 endpoints
A number of endpoints are available with Azure Active Directory OAuth2 to authenticate users. Version 2 of the AAD OAuth2 endpoints has one endpoint we’ll use for this example, known as “authorize.”
OAuth2 v2.0 Authorize endpoint, response_mode = form_post
The authorize endpoint can be used to do different things, depending on your scenario. The first we’ll try is with a response_mode of form_post. The end result of this mode is a cookie set in the web browser, for the Azure Function’s hostname, which is then passed to the Azure Function for all subsequent calls.
The URL of the authorize endpoint can be broken down as follows:
- https://login.microsoftonline.com/[tenant-id]/oauth2/v2.0/authorize
- ?response_type=code+id_token
- &redirect_uri=https%3A%2F%2F[azure-function-hostname]%2F.auth%2Flogin%2Faad%2Fcallback
- &client_id=[client-id]
- &scope=openid+profile+email
- &response_mode=form_post
- &nonce=dbaee60794b948c58f27c068611528e120170909014932
- &state=redir%3D[double-encoded-api-path]
Placeholders from above are described as follows:
| Placeholder | Description | Example |
|---|---|---|
| tenant-id | The unique identifier of the tenant to authenticate against | dd3bddbb-de02-4a12-88fd-23800bcaf824 |
| azure-function-hostname | The hostname assigned to the Azure Function app | blog-demo-ause.azurewebsites.net |
| client-id | The unique identifier, or application / client id from the app generated in the steps above | 9406ad1c-cd2c-44ae-a443-48ea0417e3dd |
| api-path | Path to the Function’s HTTP trigger | /api/HttpTriggerIdentity |
| encoded-api-path | Path to the Function’s HTTP trigger, encoded once | %2Fapi%2FHttpTriggerIdentity |
| double-encoded-api-path | Path to the Function’s HTTP trigger, double encoded | %252Fapi%252FHttpTriggerIdentity |
Full example URL:
https://login.microsoftonline.com/dd3bddbb-de02-4a12-88fd-23800bcaf824/oauth2/v2.0/authorize?response\_type=code+id\_token&redirect\_uri=https%3A%2F%2Fblog-demo-ause.azurewebsites.net%2F.auth%2Flogin%2Faad%2Fcallback&client\_id=9406ad1c-cd2c-44ae-a443-48ea0417e3dd&scope=openid+profile+email&response\_mode=form\_post&nonce=dbaee60794b948c58f27c068611528e120170909014932&state=redir%3D%252Fapi%252Fv1%252FHttpTriggerIdentity
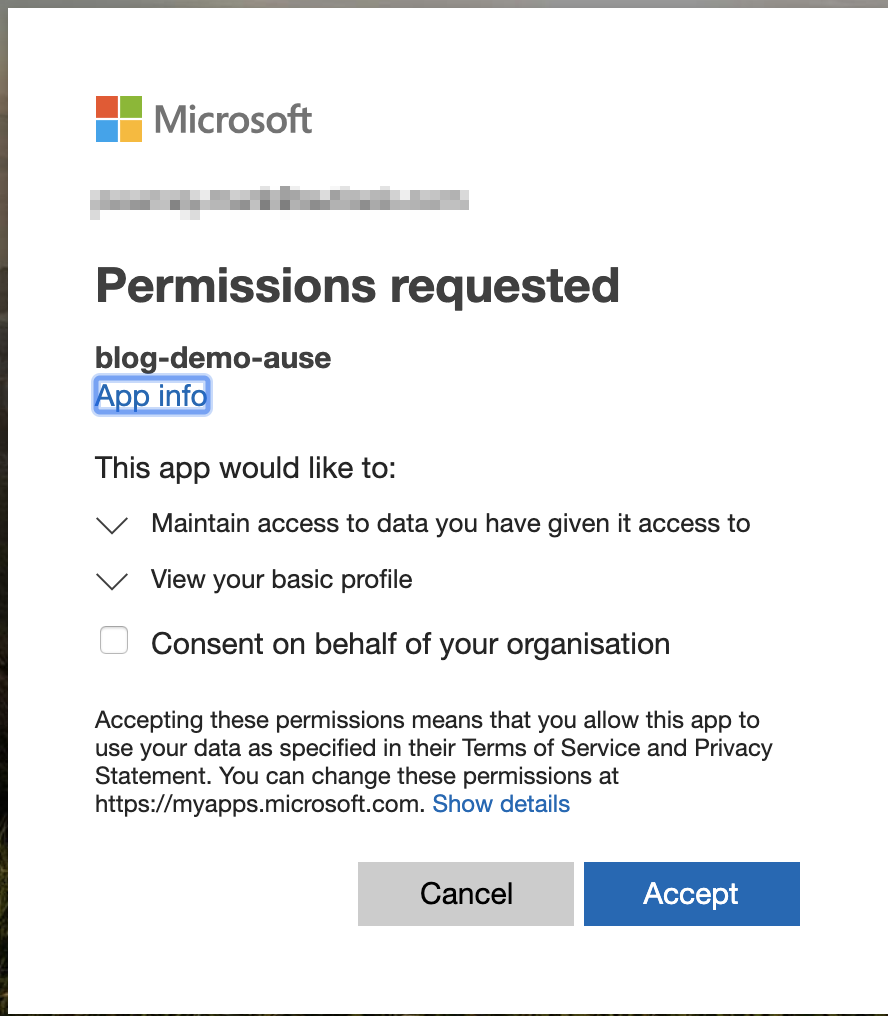
Azure Active Directory - login and consent
The first time you browse to the correct address, you will be first prompted to login. You must log in with an account that exists in the current tenant. You will then be prompted to consent to sharing your account’s details with the target application.
Before you consent to sharing your account’s details, we shold explore an alternative option for administrators - the ability to consent on behalf of the whole organisation. Tenant administrators can perform this task, so users are not prompted with this consent screen.
Tenant administrators can do this admin consent, by checking the box on the login prompt, or by browsing to the Azure Active Directory application in the Azure Portal.
How to find the consent option in the Azure Portal:
- Browse to the Azure Active Directory Overview page
- Click App registrations
- Find the Application created when the Azure Function app was created above
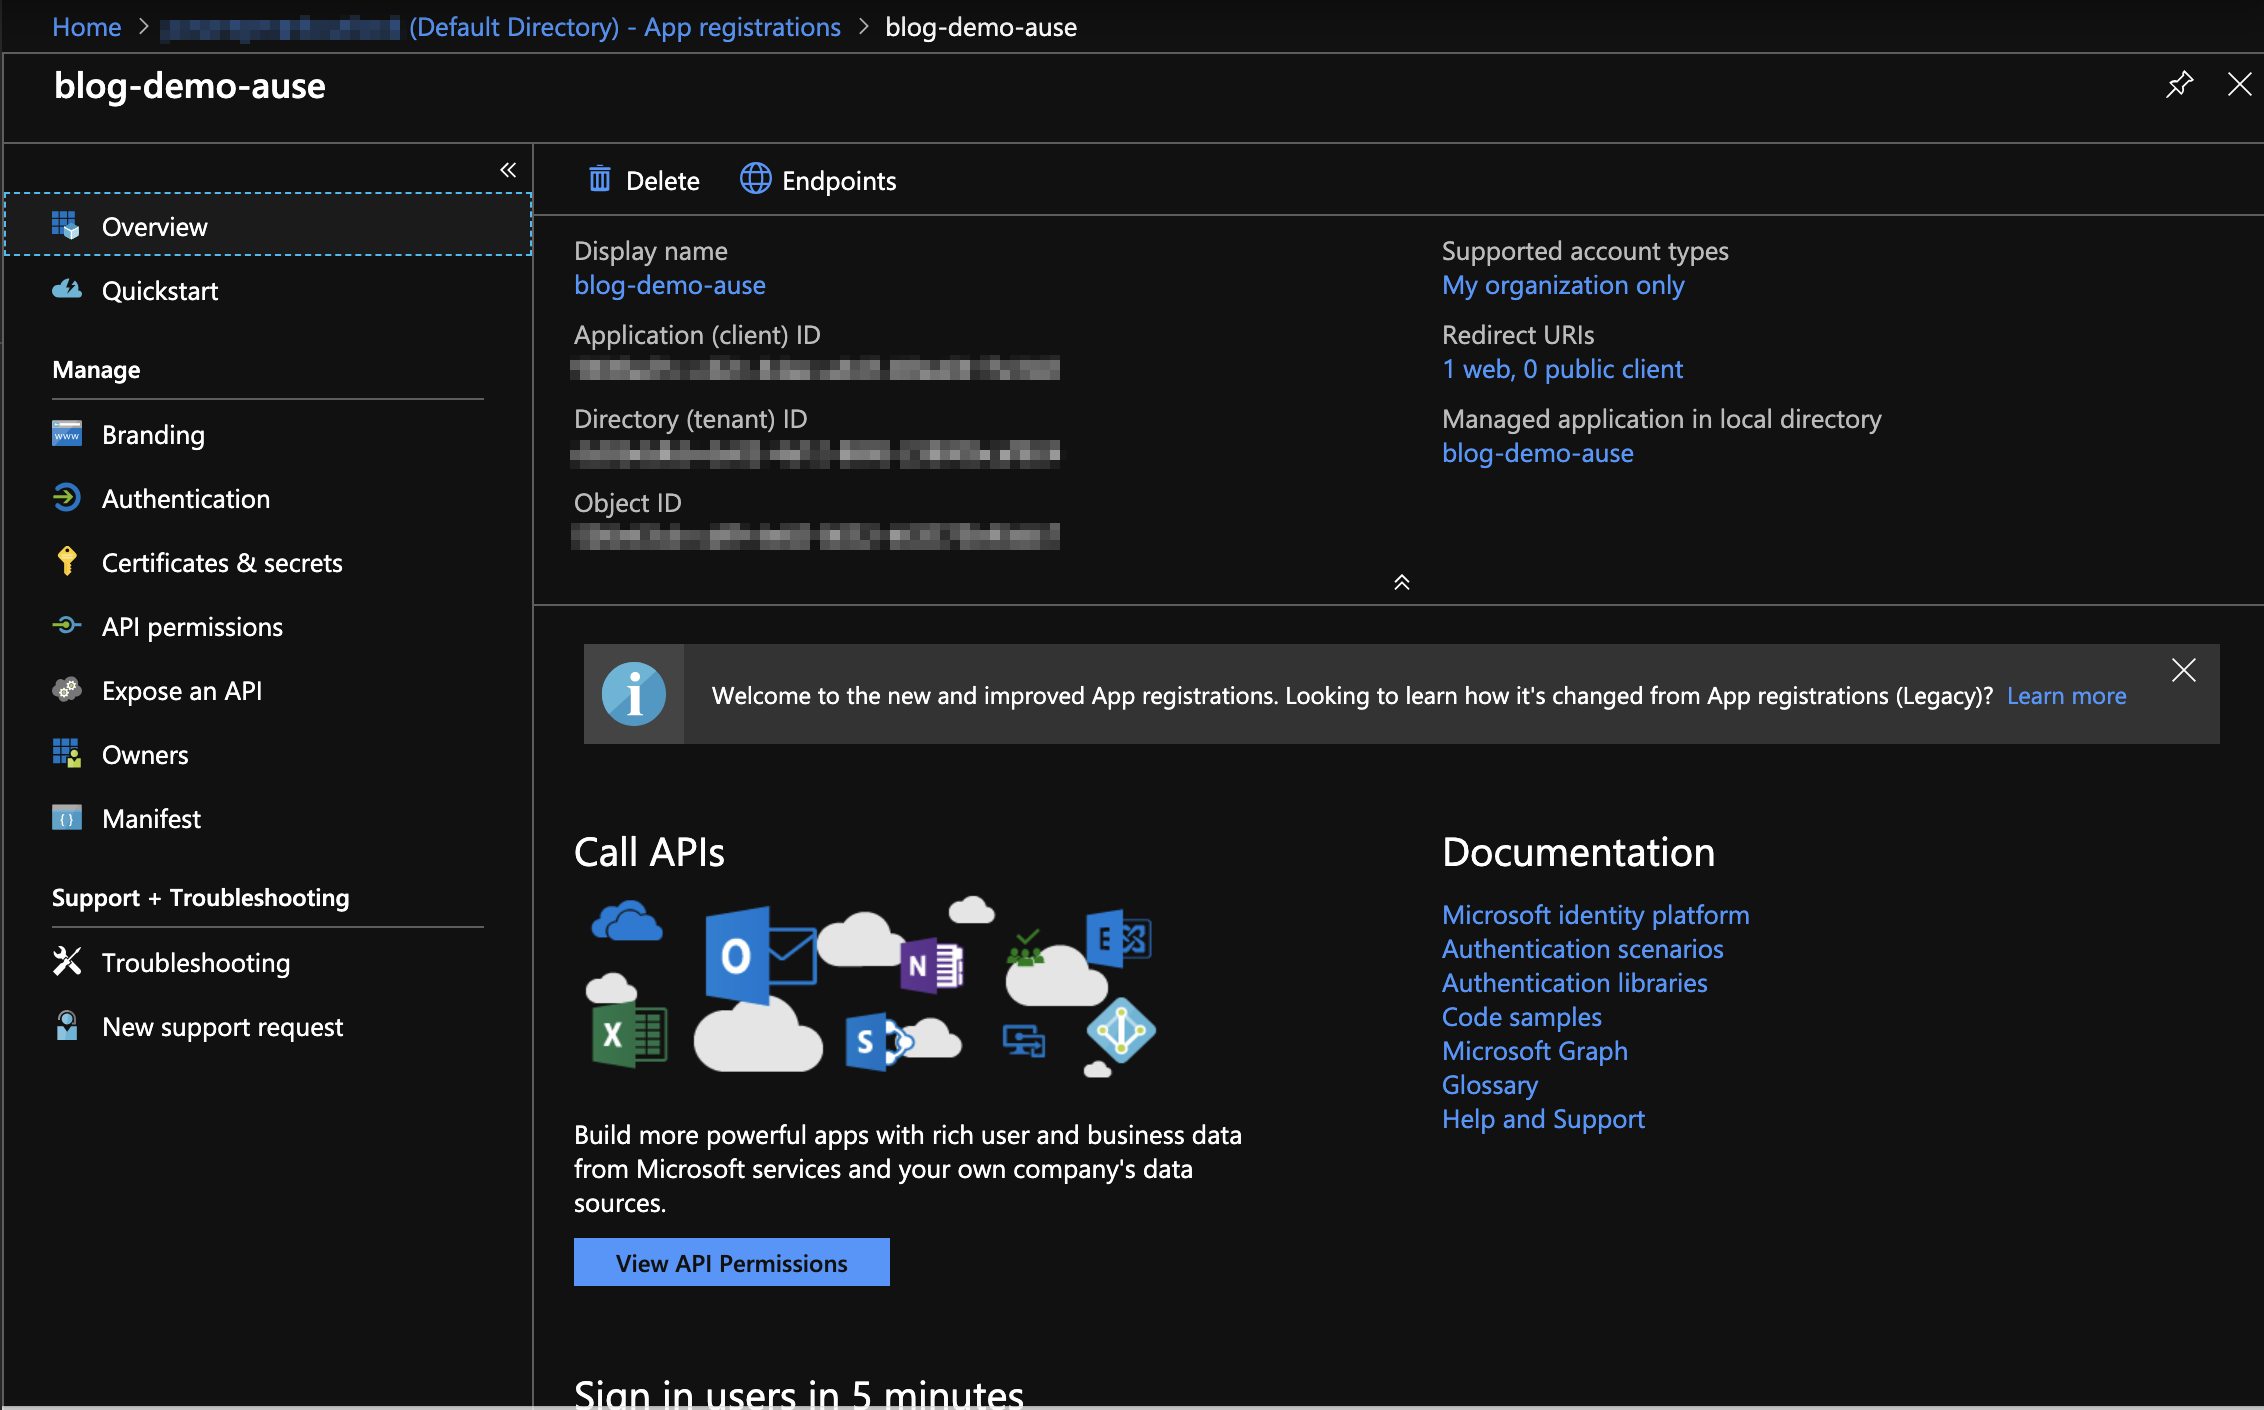
- Select API permissions
- Click the Grant admin consent for … button
- Click Yes
- Return to the private / incognito window that you had open before, browse to the login.microsoftonline.com URL generated above.
The page will redirect once and display a page with the message “Bad Request.” This is because the Azure Function’s Azure Active Directory configuration by default (in express mode) isn’t configured to accept claims from the login.microsoftonline.com URL. To fix this, go back to the Azure Function’s configuration page, and follow these steps:
- Browse to the Function App page in the Azure Portal
- Click the Name of the newly created Function App to browse to its overview
- Click the Platform features tab
- Click the Authentication / Authorization link:
- Click in to the Azure Active Directory configuration
- Change the Management mode to Advanced
- Change the Issuer Url to the following: https://login.microsoftonline.com/[tenant-id]/oauth2/v2.0
- Click OK
- Click Save on the Authentication / Authorization screen
Repeating the same request, the final redirect will no longer return a Bad Request, you should instead land on the Azure Function’s HTTPTrigger endpoint, with authenticated principal values returned in the result.

You can use this principal in the Azure Function’s code to perform your own authorisation routines, for example, checking against a table of principal names to check if they have access to the data returned by the API, before returning it.
What’s happening under the hood?
OAuth2 v2.0 Authorize endpoint for Bearer tokens, response_mode = fragment
An alternative response_mode can be used to obtain the token for later use as an Authorization Bearer in client-side API requests. To make this option possible, the Azure Active Directory application needs to be configured to accept the Azure Function API’s URL as a reply URL.
- Browse to the Azure Active Directory Overview page
- Click App registrations
- Find the Application created when the Azure Function app was created above
- Click Authentication
- Add the following URL to the list of Redirect URIs https://[azure-function-hostname][api-path]
- Click the Save button
Open a new private / incognito window, and ensure all cookies and local / session storage is cleared. Now browse to the following OAuth2 v2.0 endpoint:
- https://login.microsoftonline.com/[tenant-id]/oauth2/v2.0/authorize
- ?response_type=id_token
- &redirect_uri=https%3A%2F%2F[azure-function-hostname][encoded-api-path]
- &client_id=[client-id]
- &scope=openid+profile+email
- &response_mode=fragment
- &nonce=dbaee60794b948c58f27c068611528e120170909014932
- &state=redir%3D[double-encoded-api-path]
Note that in addition to the response_mode being a different value to the endpoint called above, so is the response_type - this is important
The page shold redirect once, but the Azure Function message will show that the request is unauthenticated. This is because the security token is not passed back as a cookie, it is instead returned in the URL of the redirect. A #id_token= should now be present in the browser’s address bar.

Using Postman we can construct a query to include the returned #id_token= value as a Bearer token. Azure Function’s automatic principal injection will take the Bearer token, and hydrate the principal’s identity and claims from the information in the token.
- Create a new query in Postman
- Enter the URL: https://[azure-function-hostname][api-path]
- Select GET as the query type
- Swap to the Authorization tab, and select Bearer token from the Type drop-down
- Enter the value of the #token= URL fragment in to the Token text box (be sure not to include anything after the token like &state=…)

Full example URL:
https://login.microsoftonline.com/dd3bddbb-de02-4a12-88fd-23800bcaf824/oauth2/v2.0/authorize?response\_type=id\_token&redirect\_uri=https%3A%2F%2Fblog-demo-ause.azurewebsites.net%2Fapi%2FHttpTriggerIdentity&client\_id=9406ad1c-cd2c-44ae-a443-48ea0417e3dd&scope=openid+profile+email&response\_mode=fragment&nonce=dbaee60794b948c58f27c068611528e120170909014932&state=redir%3D%252Fapi%252Fv1%252FHttpTriggerIdentity